The Pros ;
1). I get to do up the car according to my taste.
2). It's more satisfying when you see the end results.
The Cons;
1). I had to spend more money. That is something that I don't have in abundance unless I got a money tree growing in my backyard.
Anyway, when I look back when I first started this blog back in October, 7474 basically has nothing. I mean it's bone stock apart from the custom intake piping, K&N air filter and Ralliart radiator cap. Okay, here goes nothing let's re-cap what I had spent on and how big is the hole in my pocket. LOL!!
1. Thermo wrapped aircond hoses & powersteering hose.
I've done this to prolong the lifespan of those rubber hoses.

Damaged:
1). Thermo wrap ~ RM: 0 (Thermo wrap was donated by Zuhaili)
2. Painted the manifold cover.
Did this simply because the manifold cover looks kind of pathetic and faded.

Damaged:
1). Aerosol canned spray paint ~ RM: 0 (Left over)
3.GReddy AirRinx air filter
Initially, I had no intention of changing my air filter since I'm already using a K&N. But since Zoo made me an offer that I cannot refuse. A swap with his GReddy Air Rinx. I just jumped at the offer.

Damaged:
1). GReddy AirRinx ~ RM: 0 (Swapped with Zuhaili)
2). Air Filter bracket ~RM:15 (JFA Motorsport)
4. APP Steel braided Brake hoses
Although this may not contribute in terms of car power. But it does help the car to stop more efficiently. What's the use of horse power if you cannot stop.

Stock brake hose

APP Steel Braided Hoses
Damaged :
1). APP Steel Braided Hoses (KSP) ~ RM: 560
2). Installation (N1) ~ RM: 80
3). Motul RBF 600 ~ RM: 0
Total : RM: 640
5. Evo 7 Sports Rims
Actually I didin't bought this rims, just borrowed it from Ijud while waiting for my share money to get a new rims. But it does gives that affect in the car in terms of looks.

Damaged :
1). Evo 7 sports rim ~ RM: 0 (On loan from Ijud aka Hulk)
6. HKS Universal Titanium Tip Muffler
Since I was using the straight flow piping without any muffler. I was kind of popular especially with cops. After looking around , I finally found the muffler that looks good and with a affordable price.
What I like about this muffler is the titanium tip. It looks cool especially when it's hot.

Damaged :
1). 3" HKS Hi-Power with titanium tip(N1) ~ RM: 900 (Normal price : RM: 980)
2). Installation (JFA) ~ RM: 50
7. HKS Elbow
Wel,, this was one of the first performance mod that I've done so far since I decided to keep the car. Got it second hand from one of the MEOC member. The results was immediate especially in the response department. But no dyno chart to prove any horsepower gain. Will only know after I install the boost controller.

Comparison between stock and the HKS elbow
Damaged:
1). HKS Elbow (2nd. Hand) ~ RM: 800
2). Installation (JFA) ~ RM: 150Total: RM: 950
8). GReedy Radiator Cap
This is one of those none performance goodies that I've added. Although, I already have a Ralliart radiator cap but it doesn't look nice and furthermore it doesn't suit my GReddy engine bay theme.


Damaged :1). GReddy radiator Cap (N1RAcing) ~ RM: 90 (normal price 110)
9). Manifold Cover Re-loaded
I've sprayed the manifold cover before this but after a while the paint started to fade. This was due to the wrong paint used. This time around I got myself a high temp paint. I am quite satisfied with the results. The paint came out like a flat black finished. It gives that racy kinda looks.
The results speaks for itself
Damaged :
1). High temp spray can (Ace Hardware) - RM: 29
2). Sand paper (Ace Hardware) - RM: 2
3). Spray holder (Ace Hardware) - RM: 9.90
10). GReddy Oil Filler Cap
Something to make the engine bay more livelier. Another on of those none performance upgrades. It sure gives the engine bay a new look with just a simple change of oil cap.


Damaged :1). GReddy oil cap (N1 Racing) ~ RM: 190 (normal price RM: 220)
11). ARC Titanium Manifold Cover
This was something that had been in my wish list since the very first time I got my TME. Finally I got it. Not only it looks good, it's functional too.
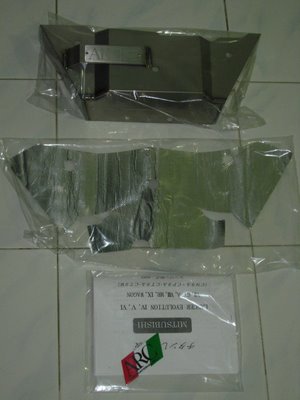
it came with thermo sticker & ARC sticker

Sticking the thermo sticker was a pain but I did it anyway
Close-up view : gave 3 layers of autosol and voila nice and shinny..

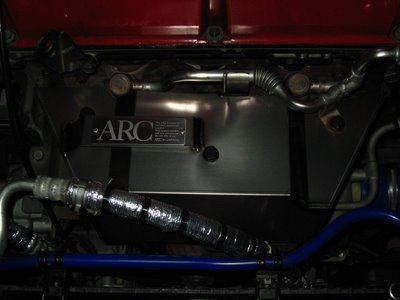
new look with the ARC manifold cover..
Damaged :1). ARC Titanium Manifold Cover ~ RM:450 nor mal price RM: 430 (N1 Racing)
12). ARC Radiator Cooling plate
Eventhough, the TME came with a stock radiator cooling plate. It looks kind of cheap due to the plastic design. Been contemplating between the monster carbon fiber or the ARC radiator cooling plate. Since I've already got myself an ARC manifold cover. I guess I just have to complete the ARC ensemble.

Close up on the ARC cooling plate. It matches the ARC manifold cover

Another look from a different angle.
Damaged:
1). ARC Radiator Cooling Plate ~ RM: 400 normal price RM:450 (N1 Racing)
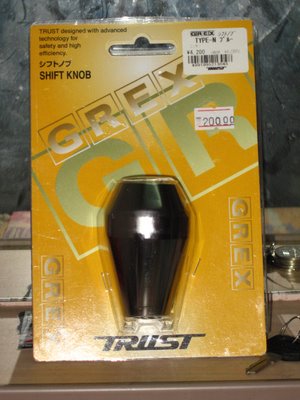
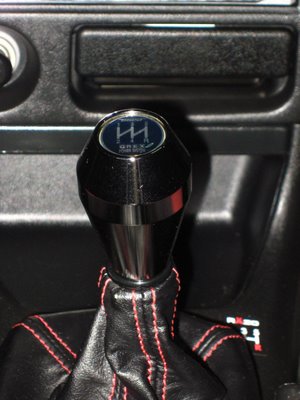
13). Trust Gearknob
Been contemplating between Ralliart and Trust gear knob. Since N1 ran out of the Ralliart gear knob, I guess there is only one gear knob left for me then. Actually after looking at it for quite a while I realise the Trust gear knob actually looks better than the Ralliart one. It must be the chrome thinggy.
Damaged:
1). Trust gear knob ~ RM: 180 normal price RM:200 (Wangan) -1st item purchase from them
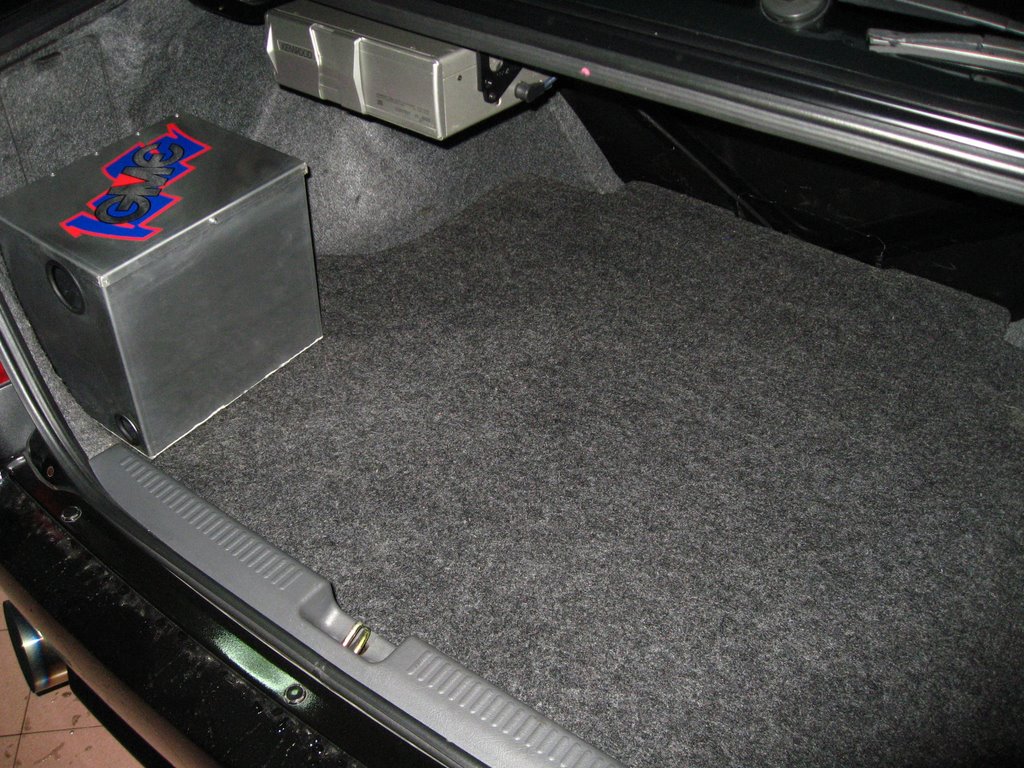
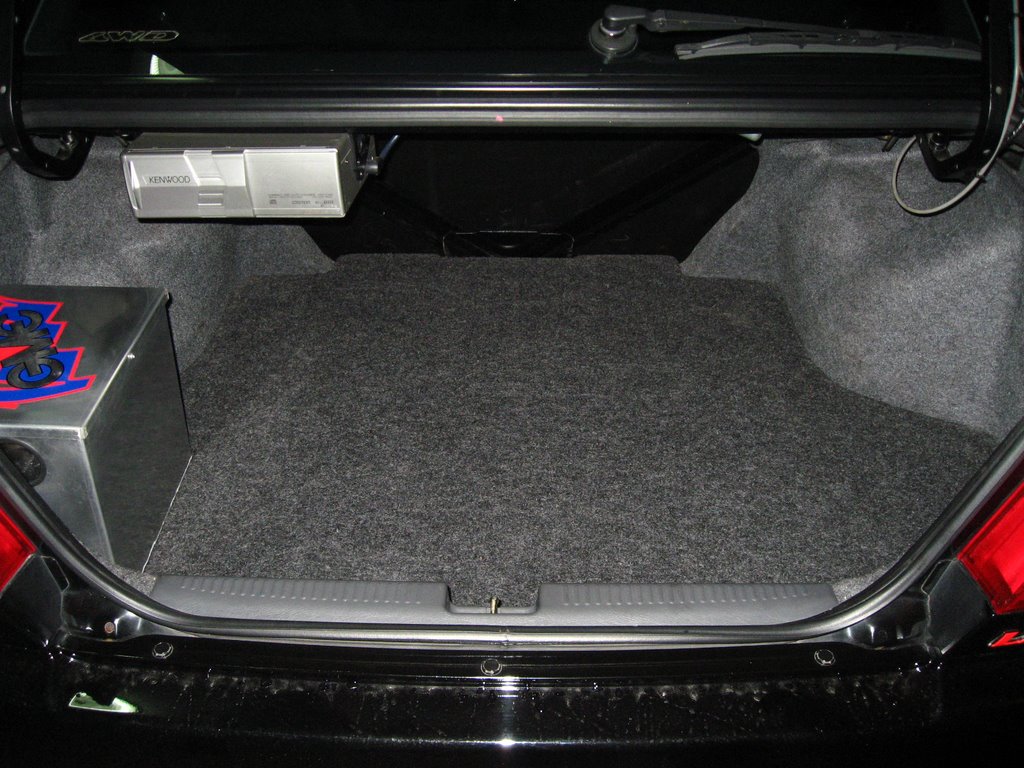
13). Boot Board
This is part of the preparation for the battery relocation kit. The end result was a neat carpeted board.

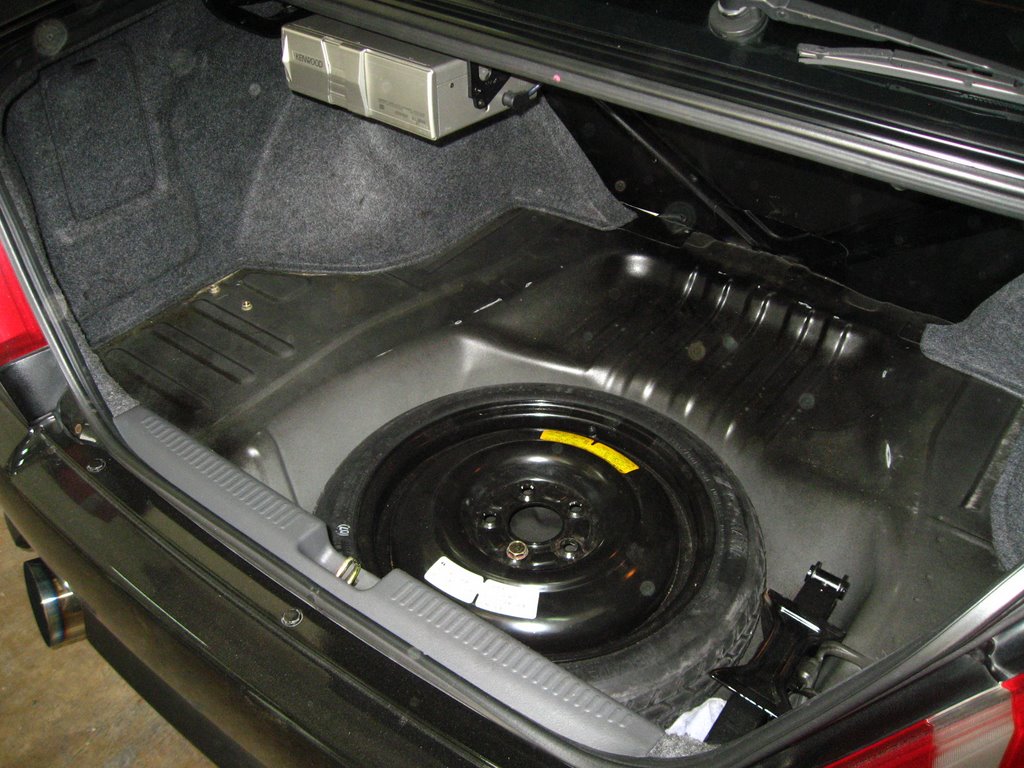
Easy access to the spare tyres

Completed rear board
Damaged:1). Custom boot board ~ RM: 160 (Shop beside JC Racing)
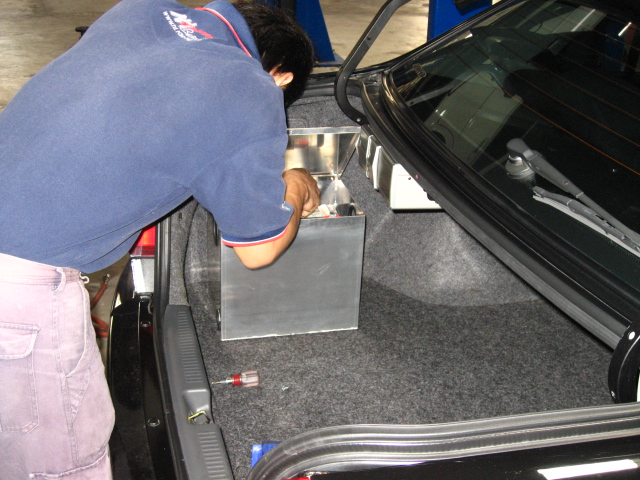
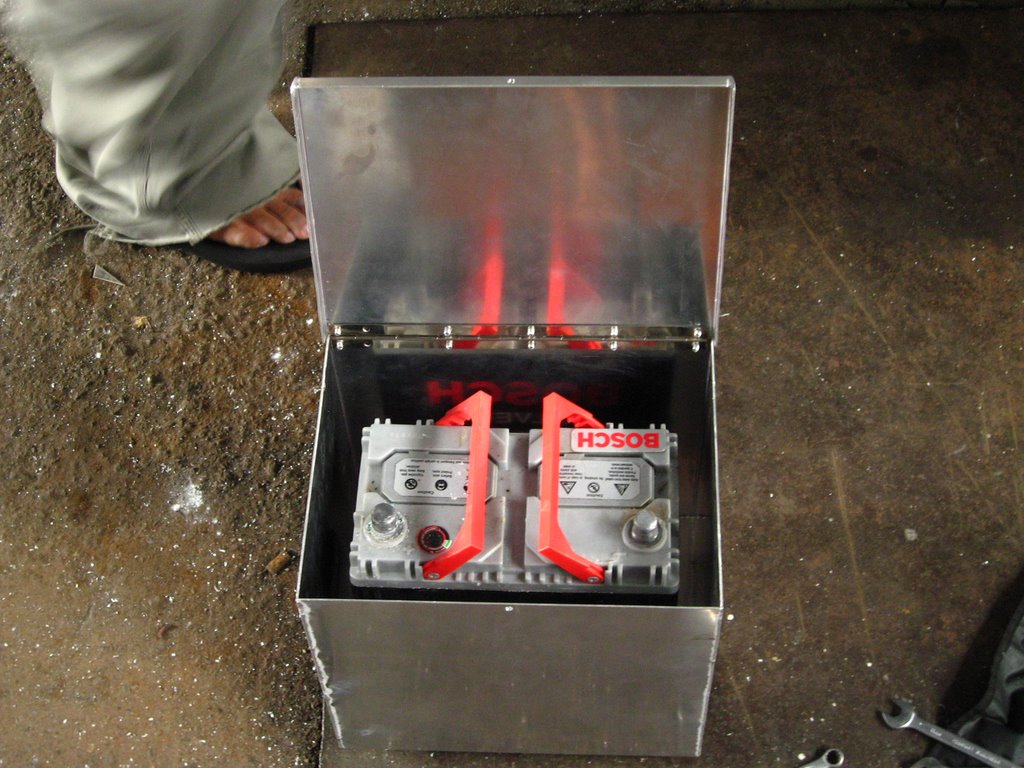
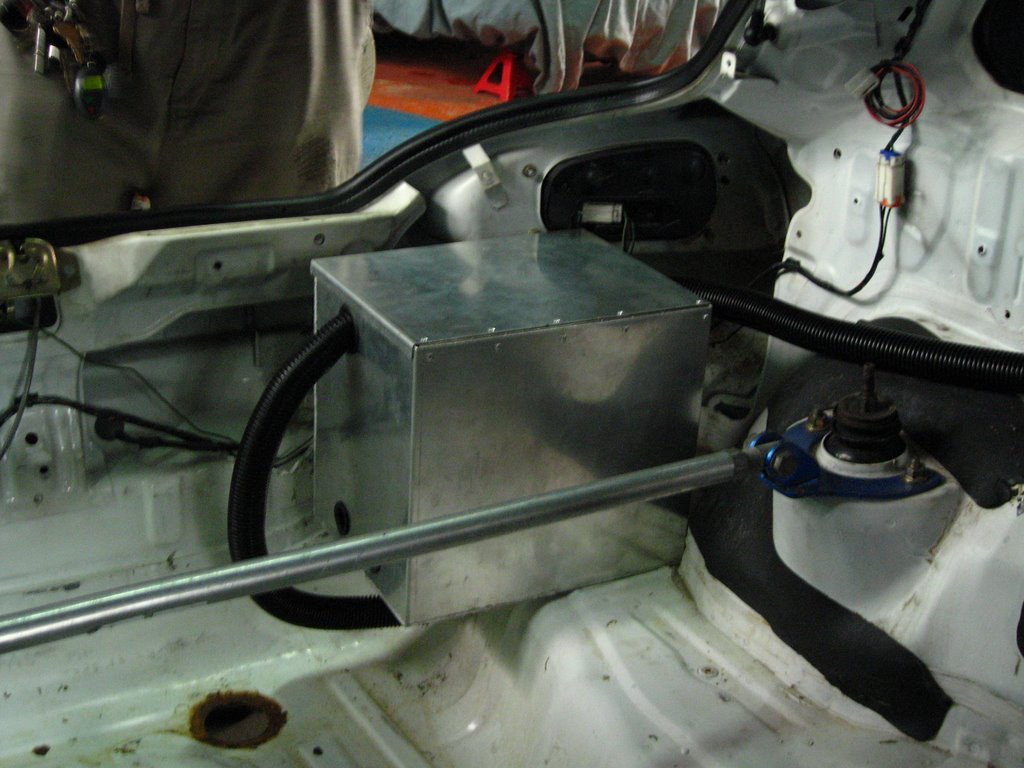
14). Battery Relocation Kit
This is the same battery relocation kit as Hazry's. It has to be cause it was design by him. After the boot board , I guess it time for the battery relocation kit to be installed.

Side View
Front view

Close-up
Damaged:
1). Battery Relocation kit + new bracket ~ RM: 195 (GME~ Suhaimi's backyard)
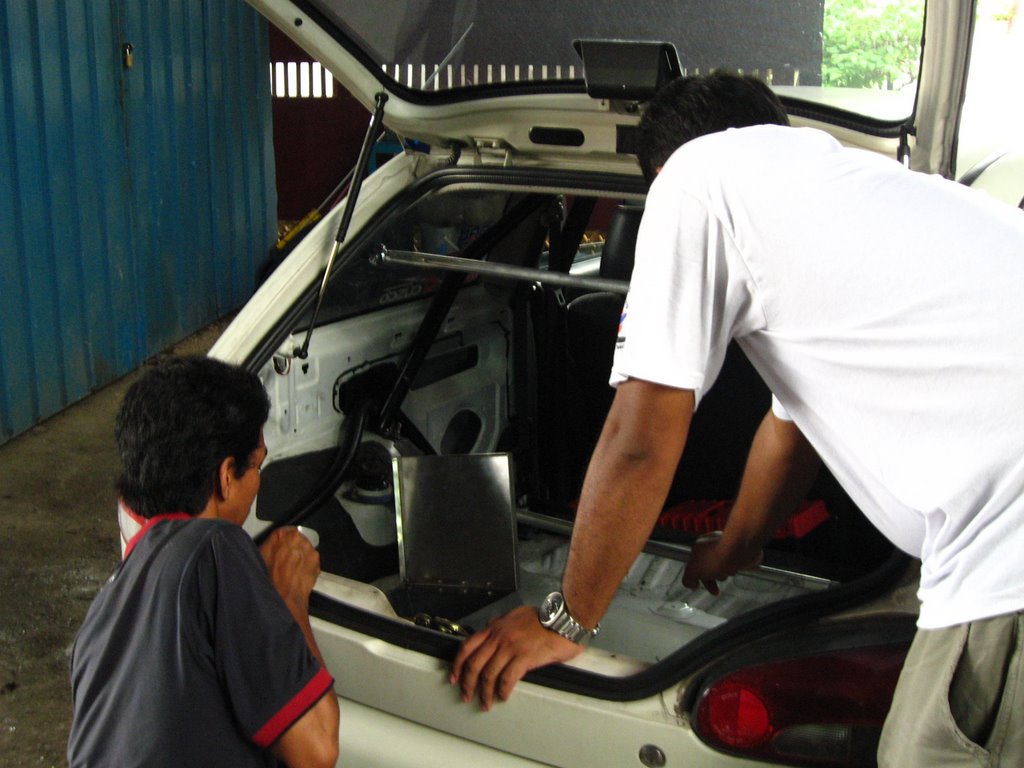
15). Battery Relocation.
Relocated the battery from the engine bay to the boot.
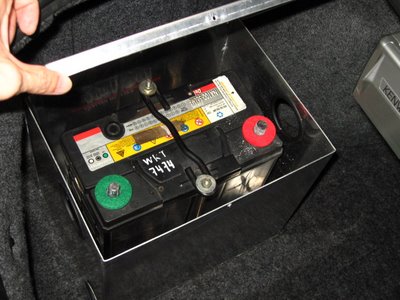
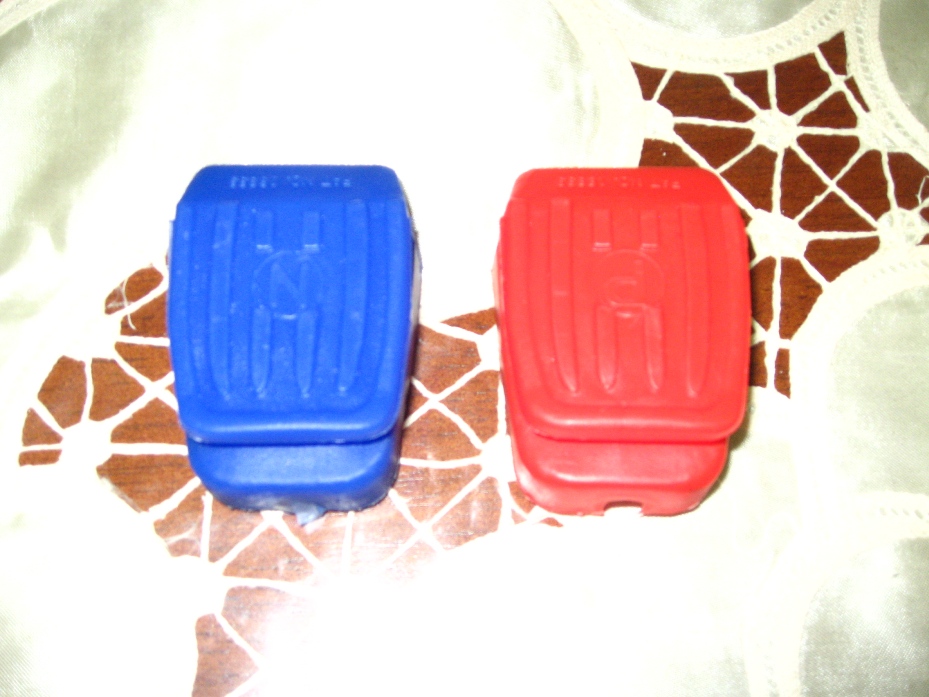
Battery in the box ; Got myself a battery terminal protector as well.

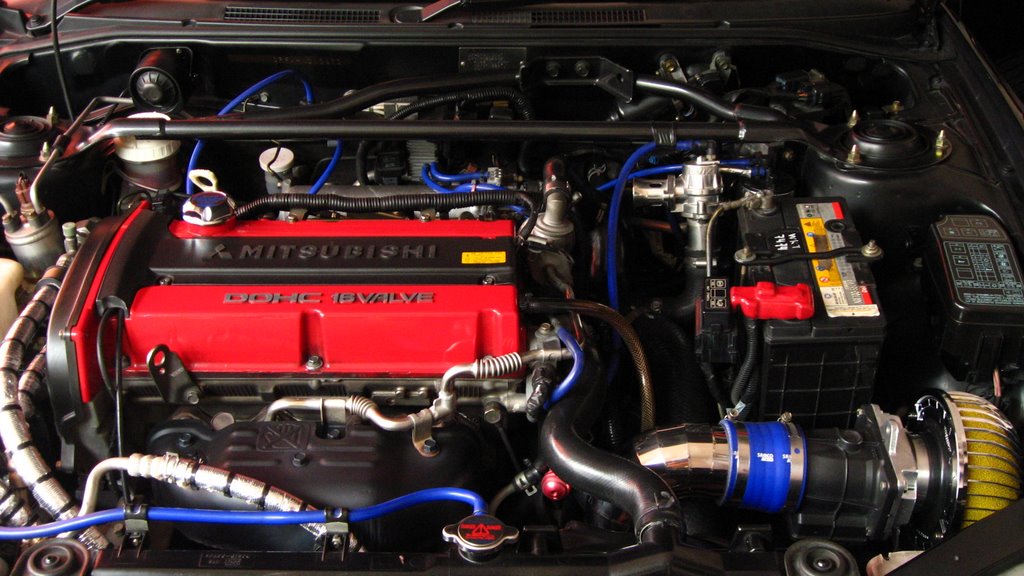
After : Battery out of the engine of the bay (Front View)
Damaged :
1). Battery relocation ~ RM: 150 (N1 Racing)
Well, I guess that's all for now. Believe it or not. This is not even half od the things I have on my list. that's the beauty about modding cars. I hope 2007 would be a better year for me and hope I get more things done this year.